
Posted on May 28, 2003
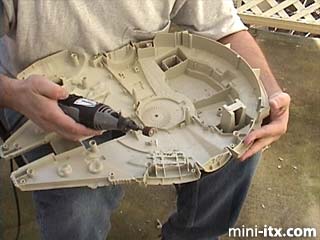
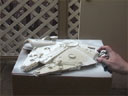
Now I grabbed my dremel and started cutting away all the pieces of plastic that were in the way of the components sitting inside the case. I also had to cut holes for all the ports such as power, video, keyboard, mouse, USB, audio, and LAN. It took some significant time to plan how everything would fit and where all the pieces should go.
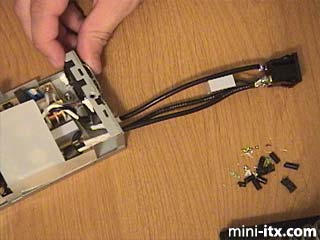
The power supply was a huge pain. First, finding
a power supply that would actually fit inside the case, especially
considering how thin the case is, was difficult. I also needed
a way to get the power cord there. Ultimately, I had to open
the power supply and lengthen the wires so the connector for
the power cord could be mounted
on the outside of the case.

Another problem I encountered was the hole in the top of the case through which the hard drive would be visible. After removing the plastic circuitry that was there, several holes were left in the side of the panels. I had to use modeling putty to fill those holes, then sand it to the right shape. After applying some epoxy to reinforce the structure, I had a hole of the proper shape.
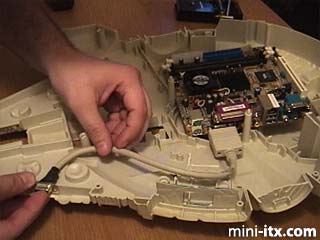
The extension cables for all the ports were something I had to think about also. Some were easy. For the PS2 ports, I simply used extender cables that I hot-glued into place. But others were harder, like the video cable. I had to take an existing cable and cut it to the right length and solder a new connector on. Argh... 15 wires and ground...
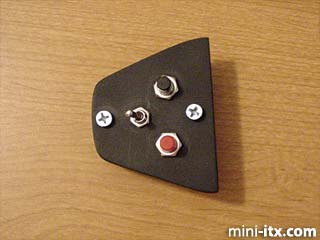
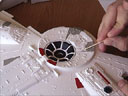
Next I worked on the control panel. I needed 3 switches on this computer: power, reset, and power for the engines. Yes, I added working engine lights based on blue electro-luminescent wire. The control panel itself is made from wood, heavily sanded, primered, and painted black.
|
|
|
|
|
|
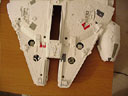
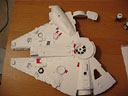
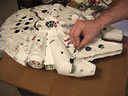
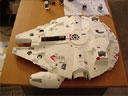
By far, the most time-comsuming aspect was the painting. Using spray paint, and lots of it, I laid down the basic colors on all the pieces, being careful not to cause any drips or runs. After enough coats, and drying time, I moved on to the detail painting. This meant coloring all those little panels the Falcon has, trying to somewhat match what the actual model looks like. After getting done with all that, then I used some charcoal to "sketch" some burn marks and dirt on the toy.
 |
 |
 |
Quick Links
Mailing Lists:
Mini-ITX Store
Projects:
Show Random
Accordion-ITX
Aircraft Carrier
Ambulator 1
AMD Case
Ammo Box
Ammo Tux
AmmoLAN
amPC
Animal SNES
Atari 800 ITX
Attache Server
Aunt Hagar's Mini-ITX
Bantam PC
BBC ITX B
Bender PC
Biscuit Tin PC
Blue Plate
BlueBox
BMW PC
Borg Appliance
Briefcase PC
Bubbacomp
C1541 Disk Drive
C64 @ 933MHz
CardboardCube
CAUV 2008
CBM ITX-64
Coelacanth-PC
Cool Cube
Deco Box
Devilcat
DOS Head Unit
Dreamcast PC
E.T.PC
Eden VAX
EdenStation IPX
Encyclomedia
Falcon-ITX
Florian
Frame
FS-RouterSwitch
G4 Cube PC
GasCan PC
Gingerbread
Gramaphone-ITX-HD
GTA-PC
Guitar PC
Guitar Workstation
Gumball PC
Hirschmann
HTPC
HTPC2
Humidor 64
Humidor CL
Humidor II
Humidor M
Humidor PC
Humidor V
I.C.E. Unit
i64XBOX
i-EPIA
iGrill
ITX Helmet
ITX TV
ITX-Laptop
Jeannie
Jukebox ITX
KiSA 444
K'nex ITX
Leela PC
Lego 0933 PC
Legobox
Log Cabin PC
Lunchbox PC
Mac-ITX
Manga Doll
Mantle Radio
Mediabox
Mega-ITX
Micro TV
Mini Falcon
Mini Mesh Box
Mini-Cluster
Mobile-BlackBox
Moo Cow Moo
Mr OMNI
NAS4Free
NESPC
OpenELEC
Osh Kosh
Pet ITX
Pictureframe PC
Playstation 2 PC
Playstation PC
Project NFF
PSU PC
Quiet Cubid
R2D2PC
Racing The Light
RadioSphere
Restomod TV
Robotica 2003
Rundfunker
SaturnPC
S-CUBE
SEGA-ITX
SpaceCase
SpacePanel
Spartan Bluebird
Spider Case
Supra-Server
Teddybear
Telefunken 2003
TERA-ITX
The Clock
ToAsTOr
Tortoise Beetle
Tux Server
Underwood No.5
Waffle Iron PC
Windows XP Box
Wraith SE/30
XBMC-ION