
Posted on December 15, 2004
EL Wire Neon
|
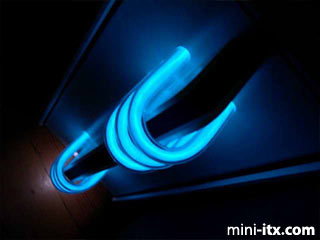
Going with the Art Deco theme for this project, I wanted to make something resembling neon lighting for the case. This project uses electroluminescent (EL) wire with acrylic and polyetheline tubing to make something that resembles neon. The acrylic tubing is 3/8 inch outside diameter. The polyetheline tubing is 1/4 inch outside diameter.
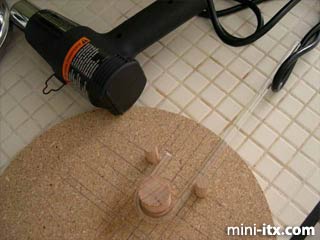
To bend the neon tubes out of acrylic, I built a bending jig. Then I used a heat gun to melt the tubing and bend it around the jig. This turned out to be a lot tougher than I expected. It's really hard to get acrylic to soften consistently, and it seems like once it gets pliable, it's easy to overheat. When it overheats, the surface starts bubbling. Also, the tubing wants to collapse when you bend it, so I had my work cut out for me. I went through six feet of tubing before I got the hang of it and had to run back to the store and get another six feet of tubing to get the six finished tubes I needed.
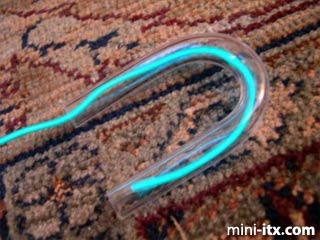
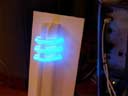
Once I had the tubes bent, the next problem was how unimpressive the tubes looked with bare EL wire threaded through them. I spent a week or two trying different things. I discovered that spray paint doesn't dry in tubing like this. Remembering my childhood and how model airplane canopies would fog up from the model glue, I tried model glue fumes. Sadly, that didn't work. Super glue fumes didn't do it either. Neither did acylic paint. Ironically, I found that sand paper would have done a great job IF ONLY I HADN'T ALREADY BENT THE TUBES. I have to admit that I had given up hope by the time I found the flexible polyetheline tubing purely by accident in a hardware store.
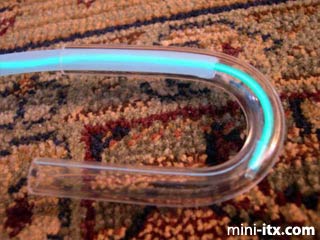
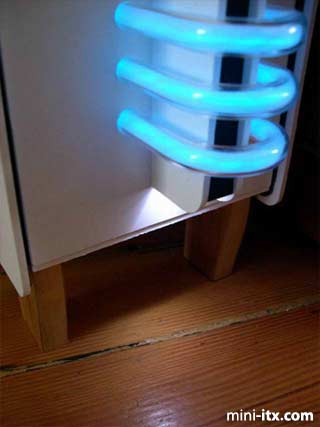
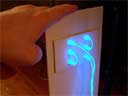
Put the EL wire into the polyetheline tubing, and then the polyetheline tubing into the acrylic tubing, and then fire it up. This definitely does the trick. I found that sanding the surface of the polyetheline tubing would diffuse the light even more. Voila! Poor man's neon.
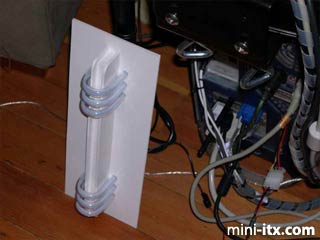
Here's the front panel assembled and ready for testing.
|
|
|
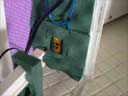
Here's the inside. I used two layers of Sintra in the places where the tubing would go through so that it would be more stable.
Next, the inside of the front panel with the foam installed. The little piece of circuit board with the connectors near the bottom is for the power and hard drive activity lights, which are built into the front.
One final shot.
 |
 |
 |
Quick Links
Mailing Lists:
Mini-ITX Store
Projects:
Show Random
Accordion-ITX
Aircraft Carrier
Ambulator 1
AMD Case
Ammo Box
Ammo Tux
AmmoLAN
amPC
Animal SNES
Atari 800 ITX
Attache Server
Aunt Hagar's Mini-ITX
Bantam PC
BBC ITX B
Bender PC
Biscuit Tin PC
Blue Plate
BlueBox
BMW PC
Borg Appliance
Briefcase PC
Bubbacomp
C1541 Disk Drive
C64 @ 933MHz
CardboardCube
CAUV 2008
CBM ITX-64
Coelacanth-PC
Cool Cube
Deco Box
Devilcat
DOS Head Unit
Dreamcast PC
E.T.PC
Eden VAX
EdenStation IPX
Encyclomedia
Falcon-ITX
Florian
Frame
FS-RouterSwitch
G4 Cube PC
GasCan PC
Gingerbread
Gramaphone-ITX-HD
GTA-PC
Guitar PC
Guitar Workstation
Gumball PC
Hirschmann
HTPC
HTPC2
Humidor 64
Humidor CL
Humidor II
Humidor M
Humidor PC
Humidor V
I.C.E. Unit
i64XBOX
i-EPIA
iGrill
ITX Helmet
ITX TV
ITX-Laptop
Jeannie
Jukebox ITX
KiSA 444
K'nex ITX
Leela PC
Lego 0933 PC
Legobox
Log Cabin PC
Lunchbox PC
Mac-ITX
Manga Doll
Mantle Radio
Mediabox
Mega-ITX
Micro TV
Mini Falcon
Mini Mesh Box
Mini-Cluster
Mobile-BlackBox
Moo Cow Moo
Mr OMNI
NAS4Free
NESPC
OpenELEC
Osh Kosh
Pet ITX
Pictureframe PC
Playstation 2 PC
Playstation PC
Project NFF
PSU PC
Quiet Cubid
R2D2PC
Racing The Light
RadioSphere
Restomod TV
Robotica 2003
Rundfunker
SaturnPC
S-CUBE
SEGA-ITX
SpaceCase
SpacePanel
Spartan Bluebird
Spider Case
Supra-Server
Teddybear
Telefunken 2003
TERA-ITX
The Clock
ToAsTOr
Tortoise Beetle
Tux Server
Underwood No.5
Waffle Iron PC
Windows XP Box
Wraith SE/30
XBMC-ION